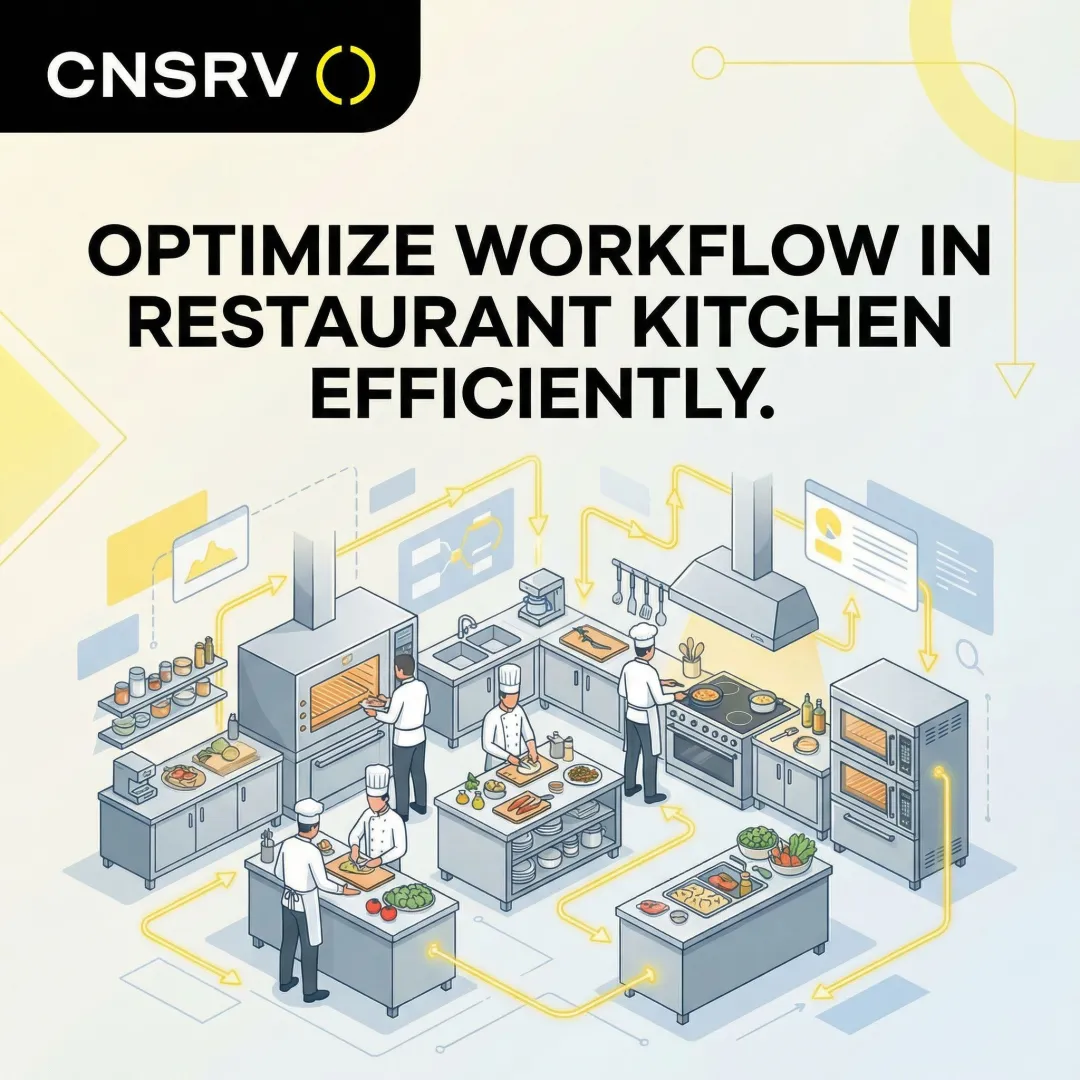
This guide covers five critical design decisions that determine whether a small kitchen runs like a well-oiled machine or becomes an operational nightmare: layout selection, functional zoning, equipment choices, storage optimization, and workflow discipline. Get these right, and your 400-square-foot kitchen can outperform competitors with twice the space.
TLDR
- Assembly line and galley layouts maximize throughput in tight spaces—island layouts waste floor space you can't afford to lose
- Zone your kitchen into five distinct areas—storage, prep, cooking, service, and cleaning—even in tight quarters
- Compact, multi-purpose equipment (combi ovens, countertop fryers, stackable units) cuts appliance clutter and reclaims counter space
- Vertical storage solutions (wall-mounted racks, undercounter refrigeration) unlock hidden capacity without expanding your footprint
- Structured workflows prevent bottlenecks at high-traffic chokepoints—especially sinks during defrosting and cleaning
Start With the Right Layout for Your Small Kitchen
Layout is the single most impactful design decision for a small kitchen because it determines staff movement patterns, order speed, and how many people can work simultaneously without colliding. Most commercial kitchens use one of three primary layouts—assembly line, galley, and zone/island—but not all are equally suited for compact spaces.
Assembly Line Layout
The assembly line layout creates a linear flow from prep → cooking → plating/packaging, with washing and storage positioned behind the main line. This configuration is widely considered the best fit for small kitchens because it minimizes cross-traffic, allows staff to focus on individual stations, and supports high-volume, consistent output with a focused menu.
This layout works particularly well for quick-service restaurants and fast-casual concepts where speed and repetition matter more than menu complexity. Each station becomes a specialized zone, so staff rarely need to cross the kitchen. That alone eliminates most of the congestion that happens when multiple cooks compete for the same equipment.
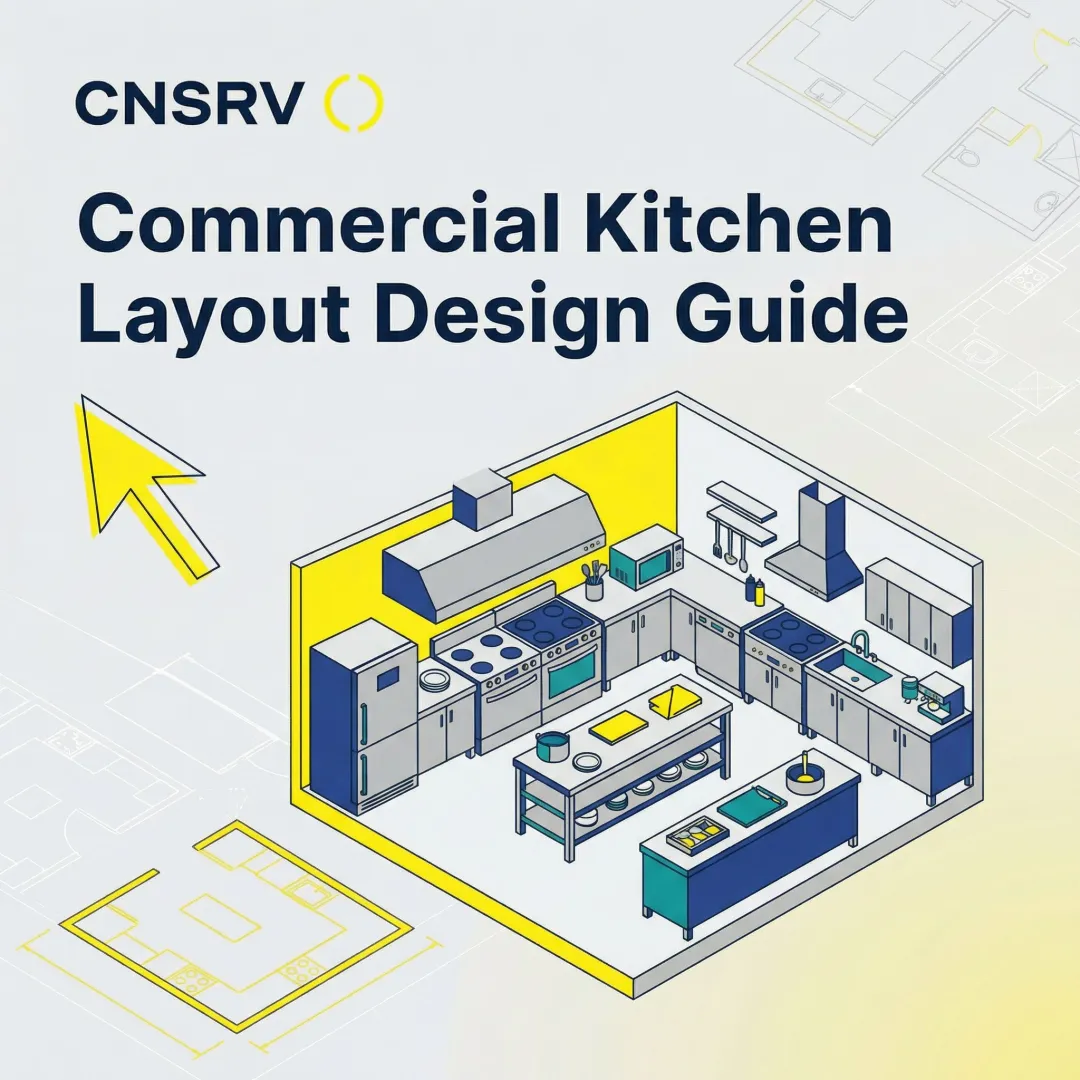
Galley Layout
The galley layout positions all stations and equipment along two parallel walls, maximizing the use of floor perimeter while leaving a central aisle for movement. Industry experts recommend this layout for making the most of narrow spaces, borrowing design principles from boat galleys and food trucks where every inch counts.
The trade-off: parallel workstations can become cramped if your team grows beyond 2-3 people working simultaneously. Maintain a minimum 36-inch aisle width to satisfy ADA accessibility requirements and allow safe staff movement, expanding to 42-48 inches if multiple cooks share the line during peak service.
Layouts to Avoid in Small Spaces
Island and open kitchen layouts are poor choices for kitchens under 500 square feet. Both designs create problems that compact spaces can't absorb:
- Island layouts consume floor space for circulation on all four sides, leaving too little room for staff movement
- Open kitchen designs create congestion when staff access equipment from multiple angles during peak service
- Both configurations work better in kitchens 800+ square feet, where centralized supervision justifies the footprint

Plan Your Kitchen Zones for Maximum Flow
Even in a tight footprint, dividing your kitchen into five defined functional zones cuts service times, reduces cross-contamination risk, and keeps staff from working against each other. "Zones" doesn't require physical walls—it means assigning dedicated areas for each task and training staff to respect those boundaries.
Storage Zone
Your storage zone should include refrigerated storage for perishables, dry storage for non-perishables, and a separate area for cleaning supplies. The FDA Food Code explicitly prohibits storing chemicals above food or food-contact surfaces to prevent contamination. Keep storage adjacent to your prep zone so ingredients are within arm's reach when staff begin daily prep work.
Food Prep Zone
The prep zone is where ingredients are washed, cut, seasoned, and staged before cooking. Where possible, separate protein prep surfaces from produce surfaces—the CDC identifies raw poultry prepared on the same cutting board as ready-to-eat foods as a primary contributing factor to foodborne illness outbreaks.
Consider implementing color-coded cutting boards (red for meat, green for produce) to visually enforce separation even when physical space is limited.
Cooking Zone
The cooking zone sits between prep and service, creating a logical flow from raw ingredients to finished dishes. In small kitchens, this zone must be carefully planned around ventilation requirements and equipment footprint. Run your heaviest-use equipment—ranges, fryers, ovens—along the main cooking line, with specialty items like steamers on secondary positions.
Cleaning and Washing Zone
The cleaning station handles dishes, utensils, and equipment washing. This zone must be easily accessible to both kitchen staff and servers, and is often best placed near the service entrance so dirty dishes don't travel through clean prep areas.
A congested cleaning zone slows your entire operation. Allocate enough space for:
- A three-compartment sink (wash, rinse, sanitize)
- Drying racks with clear airflow space
- Dedicated storage for clean items ready to return to service
Service Zone
The service area is the handoff point between kitchen and front-of-house. Position it as close to the dining area as possible to minimize food travel time and maintain dish quality. Include space for ticket rails, heat lamps, and final plating touches without interfering with the main cooking line.
Choose Compact, Multi-Purpose Equipment
In a small kitchen, every piece of equipment must earn its floor space. The goal is to favor compact, multi-purpose equipment that handles multiple tasks over single-use appliances that occupy valuable square footage.
Adopt a countertop-first philosophy: Countertop versions of fryers, kettles, and ovens free up floor space without sacrificing output. Countertop fryers like the Pitco SGC occupy just 15 inches of width compared to floor-standing models that can exceed 48 inches. Countertop convection ovens and compact tilting kettles deliver commercial capacity in a fraction of the footprint. Research whether stacking equipment—placing an oven on a refrigerated base—is feasible for your space to double capacity vertically.
Multi-purpose food prep equipment cuts your equipment count significantly. Look for:
- Food processors that slice, dice, shred, and julienne — replacing multiple single-purpose tools
- Commercial mixers with attachment hubs that handle mixing, meat chopping, and vegetable prep in one footprint
- Combination units (such as combi-ovens) that steam, roast, and bake without requiring separate appliances

Before purchasing any equipment, apply a simple two-question test: Does it physically fit the available space? Can it handle multiple menu items or tasks? Single-dish, single-function equipment rarely justifies its footprint in a tight kitchen.
Consider ventless technology: Ventless equipment like TurboChef high-speed ovens and Alto-Shaam ovens with Ventech hoods can be placed outside the primary hood line, unlocking usable space in tight corners without expensive ventilation modifications.
Traditional sink defrosting under running water monopolizes sink access — sometimes for hours — creating bottlenecks in both cleaning and prep zones. The CNSRV DC:02 defrosting system addresses this directly: it uses 98% less water and defrosts food in half the time compared to running faucet methods.
The system requires zero installation, is NSF-listed for food contact under NSF Standard 169, and ships directly to your kitchen with a simple user guide. Freeing up sink space while cutting water costs is exactly the kind of dual-function thinking that makes tight kitchens work.
Use Vertical Space and Smart Storage Solutions
Most small kitchen operators overlook vertical space—the area between countertops and the ceiling. Wall-mounted pot racks, magnetic knife strips, pegboards for utensils, and open shelving dramatically reduce countertop and drawer clutter without consuming any floor area.
Smart undercounter choices maximize every cubic foot of floor space:
- Refrigerated bases that double as countertop workspace
- Drawer-style refrigeration units under prep stations
- Shelving units on casters for easy repositioning during cleaning
These solutions place ingredients directly at the point of use, reducing staff movement and freeing up walk-in cooler space.
Getting the hardware right is only half the equation — what you store matters just as much. The restaurant industry generates approximately 18% of all U.S. food waste, costing the sector $25 billion annually. Much of this is pre-consumer spoilage driven by disorganized storage where staff can't see what's on hand and over-order.
Conduct periodic audits to remove what's unnecessary, and implement strict First-In, First-Out (FIFO) systems with clear labeling to improve inventory visibility and prevent spoilage.
Design a Menu That Fits Your Kitchen's Capacity
A large or diverse menu demands more equipment, more prep space, and more staff movement through tight corridors. In a small kitchen, keeping the menu focused is one of the most effective efficiency decisions you can make.
Cornell University's School of Hotel Administration advises operators to design menus requiring only a few flexible pieces of equipment and to eliminate any dish that is the only item requiring a specific piece of equipment. If a panini press serves only one sandwich, remove the sandwich or adapt it to be cooked on your flat top.
That same logic applies when choosing your equipment from the start. Prioritize tools that cover multiple cooking methods rather than locking you into a single function:
- Combi ovens steam, bake, roast, and grill — replacing both a steamer and convection oven in one footprint
- Griddles and sauté ranges handle a wide variety of dishes without requiring additional dedicated appliances
- Single-purpose equipment (panini presses, specialty fryers) should earn their counter space or get cut from the lineup
Build Efficient Daily Workflows to Keep Your Kitchen Running Smoothly
Even a perfectly designed kitchen becomes dysfunctional without disciplined workflows. Daily habits—how food is received, stored, prepped, defrosted, cooked, and cleaned up—directly impact how much effective space your kitchen has at any given moment.
Start with mise en place — the French culinary principle of "everything in its place." Prepping and organizing all ingredients before service begins reduces mid-service chaos, cuts unnecessary movement across the kitchen, and keeps stations ready for peak volume.
From there, look hard at your operational bottlenecks. Common culprits include:
- Under-sinks crowded with defrosting food (traditional running water defrosting can tie up a sink for 5-7 hours for large items)
- Prep areas used as temporary storage for items that belong elsewhere
- Cleaning stations that become backup points when dish volume exceeds capacity
Once you've identified the friction points, map your kitchen's movement patterns during an actual peak service. Note where staff collide, where they queue for equipment, and where sinks become unavailable. Redesigning workflows around those specific moments — not hypothetical ones — is how you reclaim functional space without moving a single wall.

Frequently Asked Questions
What is needed for a small commercial kitchen?
A functional small commercial kitchen requires five essential elements: a defined layout (assembly line or galley), five functional zones (storage, prep, cooking, service, cleaning), compact and multi-purpose equipment, smart vertical storage solutions, and a focused menu aligned with the kitchen's capacity.
How much does it cost to build a small restaurant kitchen?
Small kitchen build-outs typically range from $50,000 to $180,000 for 300-800 square feet, with lean retrofits starting as low as $35,000 if existing infrastructure is reusable. High-end builds can exceed $250,000 depending on equipment complexity and utility upgrades.
How to manage a small restaurant kitchen?
Practice mise en place, run regular storage audits, and train staff to respect designated zones. Also look for equipment or process upgrades that cut bottlenecks. Efficiency in small kitchens comes from discipline, not just design.
What is the best layout for a small restaurant kitchen?
The assembly line layout is the most widely recommended option for small kitchens because it minimizes cross-traffic and supports high-volume output with focused menus. The galley layout is a strong alternative for very narrow spaces, maximizing floor perimeter use while maintaining efficient workflow in tight footprints.
How can I maximize vertical space in a small kitchen?
Install wall-mounted shelving, pot racks, magnetic tool strips, and overhead storage to reclaim space without expanding your footprint. Undercounter refrigeration and drawer-style storage also maximize cubic footage by using space below prep surfaces that would otherwise stay empty.
What is the minimum size for a small commercial kitchen?
Anything under 500 square feet is generally considered a small commercial kitchen, with ghost kitchens often operating in as little as 200 square feet. The minimum viable size depends on menu complexity and staff count—a focused menu with 2-3 staff can operate efficiently in 200-300 square feet, while more complex operations may require 400-600 square feet.