](https://file-host.link/website/cnsrv-nnegw0/assets/blog-images/e35e47ae-73db-4107-93b5-4dc7e641000d/1772466109243186_eebf669fcfda4df9a269b4f25566efc2/360.webp)
Introduction
A professional kitchen's layout is the single biggest driver of operational efficiency. A poor layout costs restaurants time, money, and the consistency guests expect — every single service. Line cooks in poorly zoned kitchens can walk up to 4 extra miles per shift, wasting 15–25% of labor hours on unnecessary movement. Pre-consumer food waste averages 4–10% of purchases, costing the U.S. restaurant industry $25 billion annually, much of it driven by inefficient storage-to-prep workflows.
Most operators treat kitchen layout as a one-time decision, but the wrong choices create bottlenecks and wasted resources that compound with every service. The consequences go beyond slow ticket times:
- Slips, trips, and falls in cramped kitchens cost employers between $2.3 billion and $9.99 billion annually
- Moving equipment after fire suppression systems are installed can void compliance, triggering costly redesigns
This article walks through the exact steps to design a professional kitchen layout, the main layout types to choose from, critical design principles, and the most common mistakes to avoid.
TL;DR
- Plan your layout around your specific menu, service volume, and square footage — not a generic template
- Choose from five main layouts: Assembly Line, Galley, Island, Zone-Style, and Open Kitchen
- Follow zone-based workflow design (Receiving → Storage → Prep → Cook → Plate → Service) to cut cross-traffic
- Allocate space proportionally: Cooking 25–35%, Prep 20–25%, Storage 20–30%
- Plan every operational station, including code-compliant defrosting zones, before finalizing the layout to avoid costly redesigns
How to Design a Professional Kitchen Layout: Step-by-Step
Step 1: Assess Your Space and Operational Requirements
Start by measuring total square footage and documenting fixed utilities — gas lines, water supply, drains, electrical panels — along with non-movable structural elements like load-bearing walls and doors. These constraints directly determine which layout options are viable. Skip this documentation step and you risk a design that can't be installed as drawn.
Define your operational parameters before touching a floor plan:
- How many covers per service?
- What type of cuisine and menu complexity?
- How many staff need to work simultaneously?
These inputs directly determine the size and number of stations required. The Foodservice Consultants Society International (FCSI) recommends kitchens occupy 25–35% of total floor area, with approximately 5 square feet per dining seat as a baseline metric.
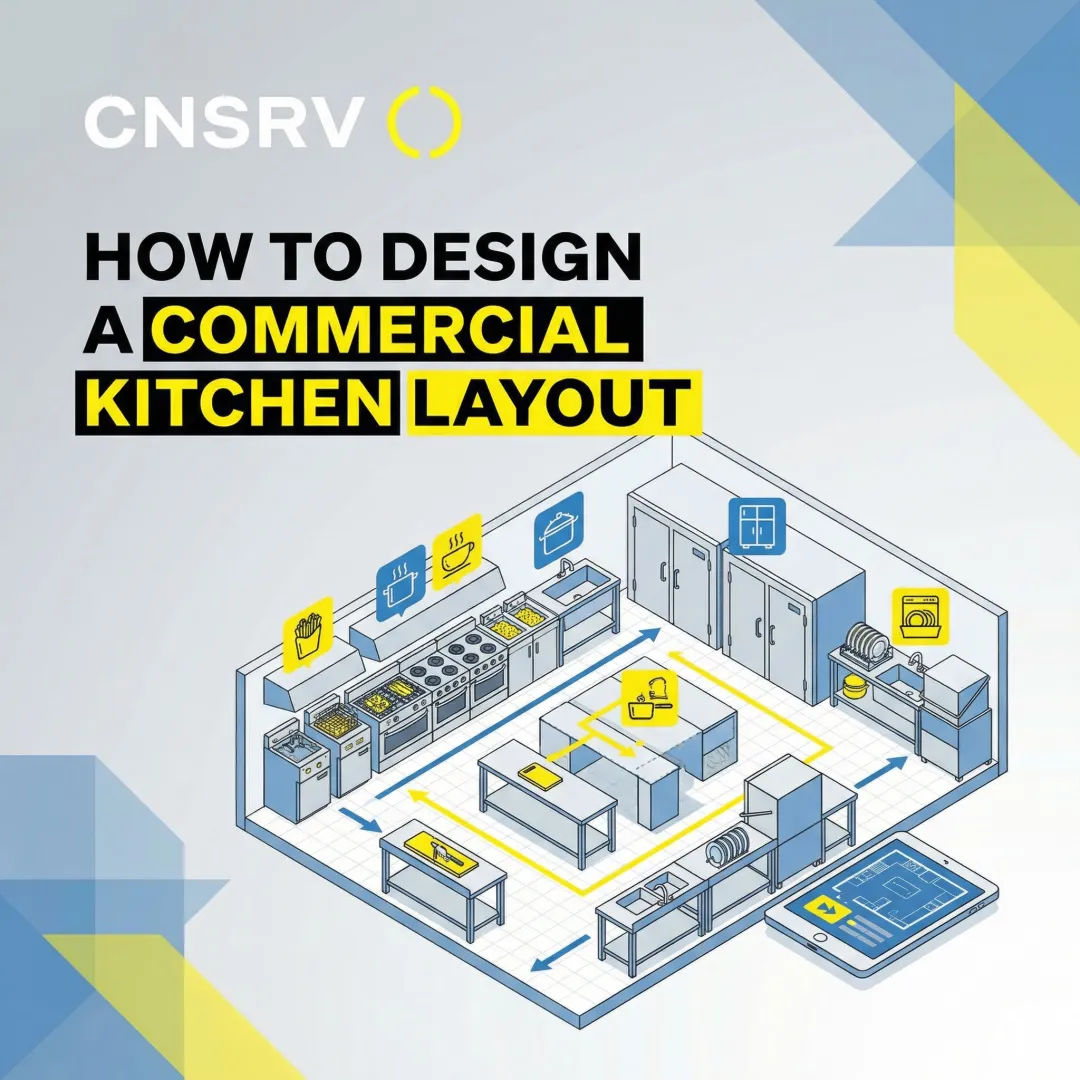
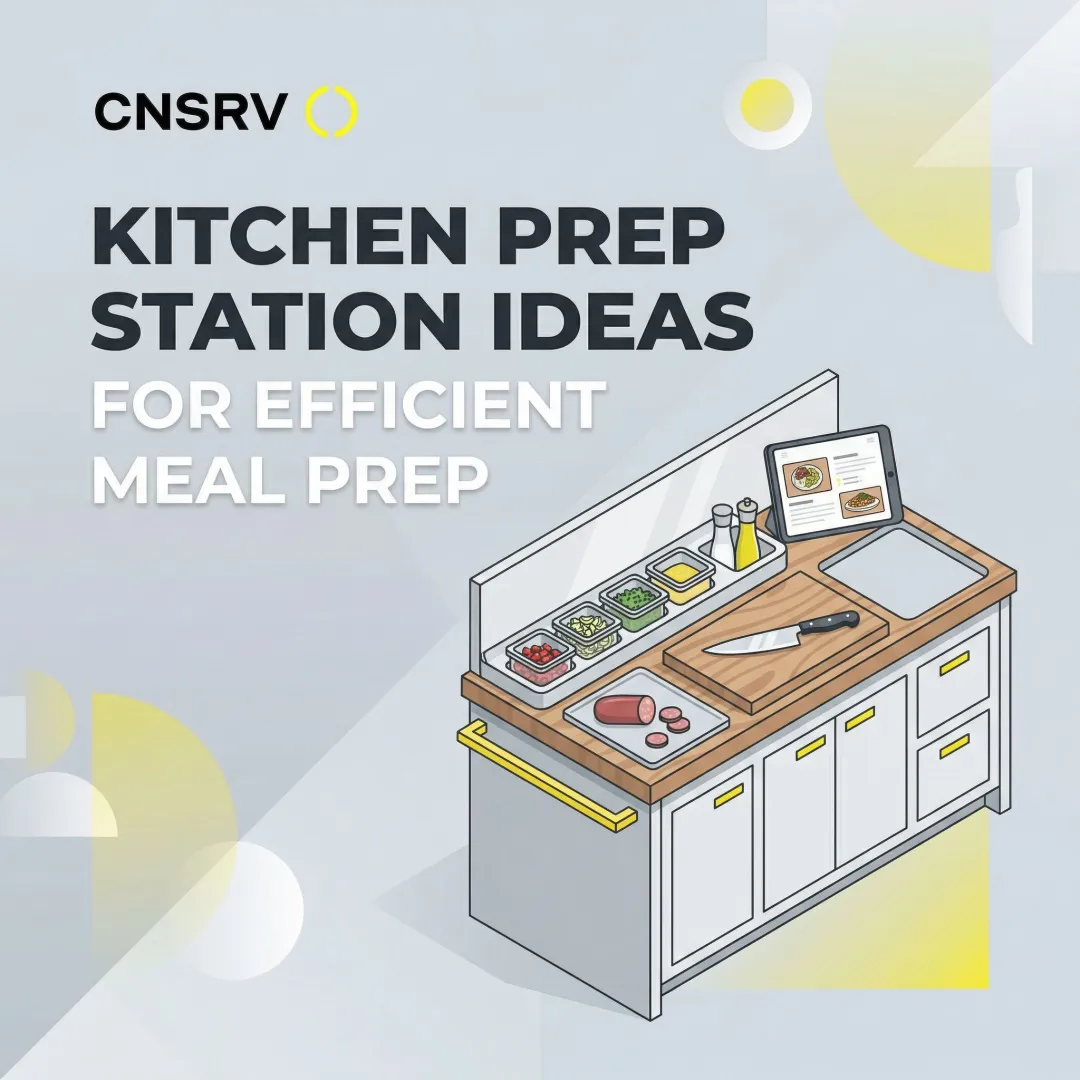
Step 2: Identify and Map Your Kitchen Zones
Divide the kitchen into core functional zones: receiving and storage, food preparation, cooking, plating and expediting, warewashing, and waste management. Each zone must be positioned to create a logical, one-directional flow that prevents cross-contamination and traffic collisions.
Within the food preparation zone, plan specifically for a dedicated thawing and defrosting station. Many kitchens lose significant water, time, and money by relying on running-water defrost methods — up to 1,000,000 gallons of water annually per kitchen. Traditional faucet thawing also creates compliance risks: municipal tap water during warmer months regularly measures 75–85°F, violating the FDA and California requirement that thawing water remain at or below 70°F.
Integrating a compliant defrosting solution like the CNSRV DC:02 into the prep zone during initial layout planning reduces both water costs and compliance risk from day one. Key specs worth noting at the design stage:
- Uses 98% less water than running-faucet methods
- Defrosts in half the time of traditional approaches
- Maintains water below 70°F, meeting FDA Food Code § 3-501.13 and California Retail Food Code § 114020
- Requires no installation; fits existing 18-inch prep sinks or larger
- Stores on wall-mounted brackets when not in use
Position the warewashing zone away from cooking and plating zones to prevent steam and noise interference. Ensure the receiving/storage zone has direct access to a rear entry point so raw goods don't cross the clean kitchen.
Step 3: Choose the Right Layout Type for Your Operation
Layout type selection must be driven by service volume, menu complexity, and available floor dimensions — not personal preference. A fast-casual operation and a full-service hotel kitchen need fundamentally different configurations.
The five main layout types each suit different operational models:
- Assembly Line — high-volume, linear production
- Galley — compact two-wall configuration for tight spaces
- Island — central cooking block for larger, open floor plans
- Zone-Style — dedicated stations for complex multi-course menus
- Open Kitchen — customer-facing design that doubles as dining theater

Each is detailed in the next section. The governing principle: let your workflow dictate your layout.
Step 4: Position Equipment Strategically
Place heavy cooking equipment (ranges, fryers, ovens) under the ventilation hood first. This anchors the entire layout since NFPA 96 requires hoods to extend at least 6 inches beyond cooking equipment on all open sides and maintain 18-inch clearance to combustible materials. All other stations must be arranged relative to this fixed point.
With the hood position set, map the pathways between the primary cooking surface, the main sink, and cold storage. Commercial designers have largely replaced the residential "work triangle" with linear zoning, but the core principle holds: eliminate backtracking wherever possible.
Allow minimum aisle width clearances:
- Single worker: 42 inches minimum (36 inches absolute minimum)
- Back-to-back cooking lines: 48 inches minimum
- Main traffic aisles: 48–72 inches
These standards, recommended by NFSMI and FCSI, ensure staff can pass safely during peak service without collisions.
Step 5: Plan for Compliance, Safety, and Inspections
Identify key regulatory areas that affect layout:
- Ventilation requirements: Hood placement, CFM ratings, and duct velocity (500–2,500 fpm per NFPA 96)
- Plumbing code: Grease trap location, sink requirements per health code
- Fire suppression: UL 300 compliance with nozzle-to-appliance mapping (moving a fryer even slightly can void coverage)
- Hand-sink placement: Must be within 25 feet of any prep or warewashing area per NYC Health Code; the 2022 FDA Food Code requires water at 85°F minimum and convenient access in all prep zones
Design with health department inspection criteria in mind from the start. Surfaces must be cleanable, there must be clear separation between raw and ready-to-eat food zones, and all defrosting methods must comply with FDA-approved practices.
Step 6: Review, Iterate, and Walk the Layout Before Finalizing
Conduct a "paper walk": physically simulate the movement of food from receiving through every station to the pass. This surfaces bottlenecks, dead zones, and dangerous crossings before any equipment is purchased or construction begins.
Involve your head chef or kitchen manager in the review process. Spaghetti diagrams that map staff movement often reveal wasted steps that designers unfamiliar with daily service will miss. A Japanese restaurant study used simulation to redesign layout and successfully reduced moving distances to predicted levels within 2 months.
The 5 Main Professional Kitchen Layout Types
No single layout is universally superior — the right choice depends on the size of the space, the style of service, and the number of staff working simultaneously.
Assembly Line Layout
The linear station-to-station configuration moves food in one direction from prep through cooking to plating. This is the dominant layout for high-volume, standardized menus such as fast food and quick service restaurants like Chipotle and Subway.
Where it falls short: the linear format creates bottlenecks when multiple staff need the same station simultaneously, making it a poor fit for complex or diverse menus.
Galley (Corridor) Layout
Two parallel counter runs face each other, maximizing use of a narrow rectangular space. Ideal for small footprint commercial kitchens, food trucks, brewery kitchens, or operations with a short, focused menu. Ghost kitchens growing at 10.32% CAGR often use this format.
Movement is restricted to a single corridor, though — a real traffic and safety concern as staff count grows.
Island Layout
A central island (typically the cooking suite) is surrounded by perimeter prep and storage stations, allowing staff to work around all sides. Best suited to larger kitchens in full-service restaurants, hotels, or catering operations with diverse menus and multiple concurrent stations. This is considered the most common layout for large square footage operations.
One hard requirement: it needs more floor space than most other layouts to function correctly. In undersized kitchens, the island creates obstruction rather than efficiency.
Zone-Style Layout
The kitchen is organized into distinct, semi-autonomous stations — each fully equipped for its function:
- Grill station
- Sauté station
- Cold prep
- Pastry
This suits ghost kitchens, large catering operations, and high-volume multi-concept operations. The main planning challenge is avoiding redundant equipment purchases while ensuring shared resources — sinks, refrigeration — are accessible from every zone.
Open Kitchen Layout
The cooking area is partially or fully visible to dining guests, blurring the line between back-of-house and front-of-house. This layout appeals to experiential dining concepts and is trending in modern restaurant design. Unlike the zone-style layout's focus on internal workflow, the open kitchen is as much about guest experience as it is about operations.
One non-negotiable: a high-performing ventilation and exhaust system is essential. Without it, smoke, grease, and noise will disrupt the dining experience you're trying to create.
Key Design Principles That Affect Every Professional Kitchen Layout
Three principles determine whether a professional kitchen layout holds up under real service conditions — and they apply regardless of footprint, concept, or volume.
The Kitchen Work Triangle
The residential "work triangle" (sink-stove-fridge) has been largely replaced in commercial design by linear zoning. However, the principle of keeping the spatial relationship between the primary cooking surface, the main sink, and cold storage compact and unobstructed remains universally applied.
Commercial kitchens follow a linear workflow path: Receiving → Storage → Prep → Cooking → Plating → Service. This prevents staff from moving backward through the process, reducing cross-contamination and collisions.

Traffic Flow and Separation of Functions
A well-designed kitchen establishes clear, one-directional flow. Cross-traffic between clean and dirty zones creates food safety risk and slows service during peak hours.
Zone-based design addresses this by dividing the kitchen into specialized blocks, each handling one stage of the workflow:
- Receiving and storage kept separate from prep and cooking areas
- Prep zones positioned upstream to feed cooking stations without backtracking
- Dirty dish return routed away from clean food paths
- Plating and service placed closest to the pass or front-of-house
How much floor space each zone receives is just as important as where it sits.
Space Allocation Proportions
The "60/30/10 rule" commonly cited for kitchens is actually an interior design color rule with no primary source linking it to commercial kitchen space allocation.
Validated commercial allocation ranges:
- Cooking/Production: 25–35%
- Preparation: 20–25%
- Storage: 20–30%
- Cleaning/Washing: 15–20%
- Service/Plating: 10–15%
Commercial kitchen design consultants use these ranges as a baseline, adjusting for menu type and service volume. A kitchen heavy on frozen protein prep, for example, may shift more square footage toward a dedicated thawing and prep zone rather than cramping that function into the general storage allocation.
What You Need Before Finalizing Your Professional Kitchen Layout
Preparing the right inputs before committing to a layout prevents the most common and expensive redesign scenarios.
Space and Utility Documentation
Document before layout design begins:
- Accurate floor plan with utility locations (gas, water, electrical, drains)
- Ceiling height (which affects hood and ventilation design)
- Structural constraint points (load-bearing walls, columns, exits)
Designing without this documentation leads to layouts that cannot be installed as drawn.
Equipment Specifications and Vendor Lead Times
Equipment must be selected and specified (with exact dimensions) before the layout is finalized, not after. Oversized or incorrectly sized equipment ordered after the layout is fixed is one of the most common and costly commercial kitchen mistakes.

For example, if you plan to include a defrosting station, know whether your solution requires dedicated plumbing, electrical connections, or floor drains. The CNSRV DC:02 requires none of these: it's completely portable, works in existing prep sinks, and requires zero installation. By contrast, other equipment may have different infrastructure needs that must be planned from the start.
Health Department Pre-Application or Pre-Review
Kitchen designers strongly recommend engaging the local health department or a licensed kitchen designer familiar with local code before finalizing the layout. Design-stage corrections are free while post-construction corrections are extremely costly.
Verify local amendments to FDA Food Code and NFPA 96 before drawing your final layout.
Common Mistakes When Designing a Professional Kitchen Layout
Even well-intentioned kitchen designs consistently fail in the same ways. Here are the four mistakes that cause the most expensive problems after opening.
Traffic volume miscalculated at low staffing levels. Kitchens that feel spacious for a crew of five become hazardous at peak service. Main traffic aisles should be at least 48–72 inches wide; back-to-back cooking lines require a 48-inch minimum. Design for your busiest shift, not your average one.
Layout built around existing equipment instead of required workflow. Retrofitting a design around equipment you already own consistently produces non-compliant kitchens that are expensive to correct. Moving cooking appliances after fire suppression is specified requires re-evaluating the entire system — UL 300 nozzles are appliance-specific and cannot simply be repositioned.
Non-cooking functions left without dedicated zones. Prep, thawing/defrosting, warewashing, and waste management are routinely under-spaced in initial designs. When there's no compliant defrosting zone, kitchens default to running faucets — a workaround that wastes up to 1,000,000 gallons of water per year and puts operations out of code compliance.
No physical walkthrough before the design is finalized. Layouts that are never physically simulated almost always contain bottlenecks invisible on paper. Use spaghetti diagrams and paper walks before equipment is ordered — corrections after installation require relocation or construction.

Conclusion
A professional kitchen layout is most successful when built in the correct order: operational requirements first, zone mapping second, layout type selection third, equipment specification fourth, and compliance review throughout.
The most common layout failures — bottlenecks, compliance violations, and inefficient workflows — all trace back to skipping early planning steps or working around constraints that should have been resolved upfront. Investing time in proper layout planning delivers a 7:1 benefit-cost ratio through reduced food waste, lower labor costs, faster ticket times, and improved regulatory compliance.
Frequently Asked Questions
Frequently Asked Questions
What is the 60 30 10 rule for kitchens?
The 60/30/10 rule is an interior design color guideline with no validated application to commercial kitchen space allocation. For professional kitchens, use these documented zone proportions: Cooking 25–35%, Prep 20–25%, Storage 20–30%, Cleaning 15–20%, and Service 10–15%.
What are the 5 most common kitchen plan arrangements?
The five main layouts, each suited to different service volumes and menu complexity:
- Assembly Line — best for QSR and fast casual
- Galley — food trucks and small footprints
- Island — full-service restaurants and hotels
- Zone-Style — ghost kitchens and multi-concept operations
- Open Kitchen — experiential dining
What is the 3x4 kitchen rule?
The 3x4 rule suggests three countertops of four feet each for prep, cook, and clean. This is a residential guideline from the National Kitchen & Bath Association and is not a recognized standard for professional high-volume commercial kitchens.
What is the kitchen work triangle and does it apply to commercial kitchens?
The work triangle refers to the spatial relationship between sink, stove, and refrigerator. In commercial kitchens, this has evolved into linear zone planning — Receiving → Storage → Prep → Cook → Plate — which minimizes backtracking and prevents cross-contamination between raw and ready-to-eat zones.
How much space does a professional commercial kitchen need?
Commercial kitchens should occupy 25–35% of total facility space, with roughly 5 square feet per dining seat as a baseline. A 200-meal-per-day operation typically requires:
- 500 sq ft of prep and cooking area
- 200 sq ft of dry storage
- 130 sq ft of refrigeration
What are the most important zones in a professional kitchen?
The six core functional zones are receiving/storage, prep, cooking, plating/expediting, warewashing, and waste management. Zone separation is a food safety and workflow requirement — it prevents cross-contamination and establishes one-directional flow from raw goods to finished plates.